2. Set up the container registry#
BinderHub will build Docker images out of Git repositories, and then push them to a Docker registry so that JupyterHub can launch user servers based on these images. You can use any registry that you like, though this guide covers how to properly configure several popular registries. The next step, Set up BinderHub, explains how you can properly configure BinderHub to use one of these registries.
2.1. Set up Google Container Registry#
To use Google Container Registry (gcr.io), first you need to activate it
under your Google Cloud account:
Go to the [API Library](https://console.cloud.google.com/apis/library)
Search for Google Container Registry API
Click on Enable
Follow the instructions to configure billing if you haven’t already
Go to the [Google Container registry settings](https://console.cloud.google.com/gcr/settings), set the images to public, so that they can be pulled back from BinderHub to the container dedicated to execution
Next you’ll need to provide BinderHub with proper credentials so it can push images. You can do so by creating a service account that has authorization to push to Google Container Registry:
Go to console.cloud.google.com
Make sure your project is selected
Click
<top-left menu w/ three horizontal bars> -> IAM & Admin -> Service Accountsmenu optionClick Create service account
Give your account a descriptive name such as “binderhub-builder”
Click
Role -> Storage -> Storage Adminmenu optionClick Create Key
Leave key type as default of JSON
Click Create
These steps will download a JSON file to your computer. The JSON file
contains the password that can be used to push Docker images to the gcr.io
registry.
Warning
Don’t share the contents of this JSON file with anyone. It can be used to gain access to your google cloud account!
Important
Make sure to store this JSON file as you cannot generate a second one without re-doing the steps above.
2.2. Set up Docker Hub registry#
To use Docker Hub (hub.docker.com) as a registry first you have to create a
Docker ID account
in Docker Hub. Your
Docker ID (username) and password are used to push Docker images to the registry.
If you want to store Docker images under an organization, you can create an organization. This is useful if different Binder instances want to use same registry to store images.
2.3. Set up Azure Container Registry#
To use Azure Container Registry (ACR), you’ll need to provide BinderHub with proper credentials so it can push images. You can do so by creating a Service Principal that has the AcrPush role.
This section uses the Azure command line. Installation instructions can be found in the Microsoft docs.
Login to your Azure account:
az login
Select your chosen subscription:
az account set -s <SUBSCRIPTION>
Note
You can see which subscriptions you have available by running:
az account list --refresh --output table
If you do not have a Resource Group, then create one:
az group create --name <RESOURCE_GROUP_NAME> --location <RESOURCE_GROUP_LOCATION> --output table
where <RESOURCE_GROUP_LOCATION> refers to a data centre region.
See a list of regions here.
If you already have a Resource Group you’d like to use, then you can skip this step.
Create the ACR:
az acr create --name <ACR_NAME> --resource-group <RESOURCE_GROUP_NAME> --sku Basic --output table
where:
<ACR_NAME>must be between 5-50 alphanumeric characters and is unique to Azure. If you’re not sure your chosen name is available, you can runaz acr check-name --name <ACR_NAME> --output table.--skuis the pricing and capacity tier for the registry. See this page for more details.
Login in the ACR:
az acr login --name <ACR_NAME>
Note down the AppID of the ACR:
az acr show --name <ACR_NAME> --query "id" -o tsv
We need this in order to assign the AcrPush role which will allow BinderHub to push images to the registry. You can save this to a bash variable like so:
ACR_ID=$(az acr show --name <ACR_NAME> --query "id" -o tsv)
Create a Service Principal with the AcrPush role assignment:
az ad sp create-for-rbac --name <SP_NAME> --role AcrPush --scope <ACR_ID>
where:
<SP_NAME>is a recognisable name for your Service Principal, for examplebinderhub-sp,<ACR_ID>is the AppID we retrieved in step 6 above. You can replace this with${ACR_ID}if you saved it to a bash variable.
Important
Note down the AppID and password that are output by this step. These are the login credentials BinderHub will use to access the registry.
The password will not be recoverable after this step, so make sure you keep it safe!
If you’d like to save this info to bash variables, you can replace step 8 with the following commands:
SERVICE_PRINCIPAL_PASSWORD=$(az ad sp create-for-rbac --name <SP_NAME> --role AcrPush --scopes <ACR_ID> --query password --output tsv)
SERVICE_PRINCIPAL_ID=$(az ad sp show --id http://<SP_NAME> --query appId --output tsv)
2.4. Set up the OVH Container Registry#
To use the OVH Container Registry, log in to the OVH Control Panel.
Click on Managed Private Registry
Click on the Create a private registry button
Select a Region, a Name for the registry and a Plan.
Generate the Harbor identification details to connect to the registry
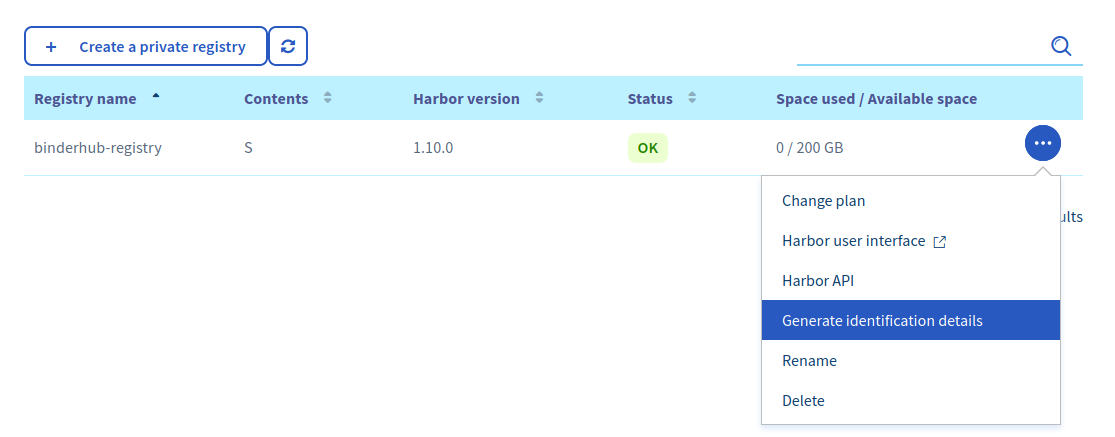
Generate the identification details to connect to the registry.#
Then click on Harbor API to retrieve the URL of the registry
Log in to the Harbor Interface using the identification details, and create a new project:
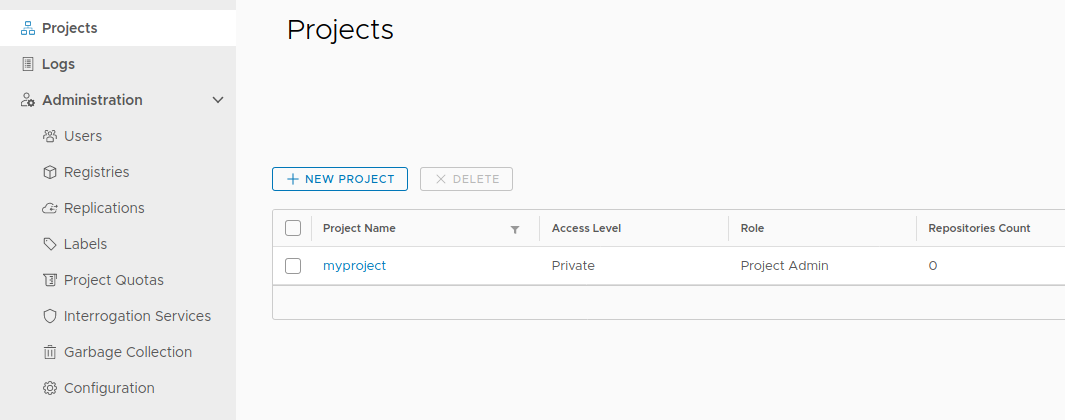
Create a new Harbor project.#
The name of the project will be used when setting up the registry config in the next section
For more information about these steps, check out the OVH Documentation
2.5. Next step#
Now that our cloud resources are set up, it’s time to Set up BinderHub.